Invite Users
Send an invite from the hub or from a single workspace, grant access and permissions, and resend login emails.
Who Can Invite
Hub admins invite people into any workspace in the hub. Workspace members invite people only into workspaces they can already open, with permissions they already hold.
Pick your role below. For someone already on the roster, use Resend login email for a new sign-in link, or enter their email in Invite to add another workspace.
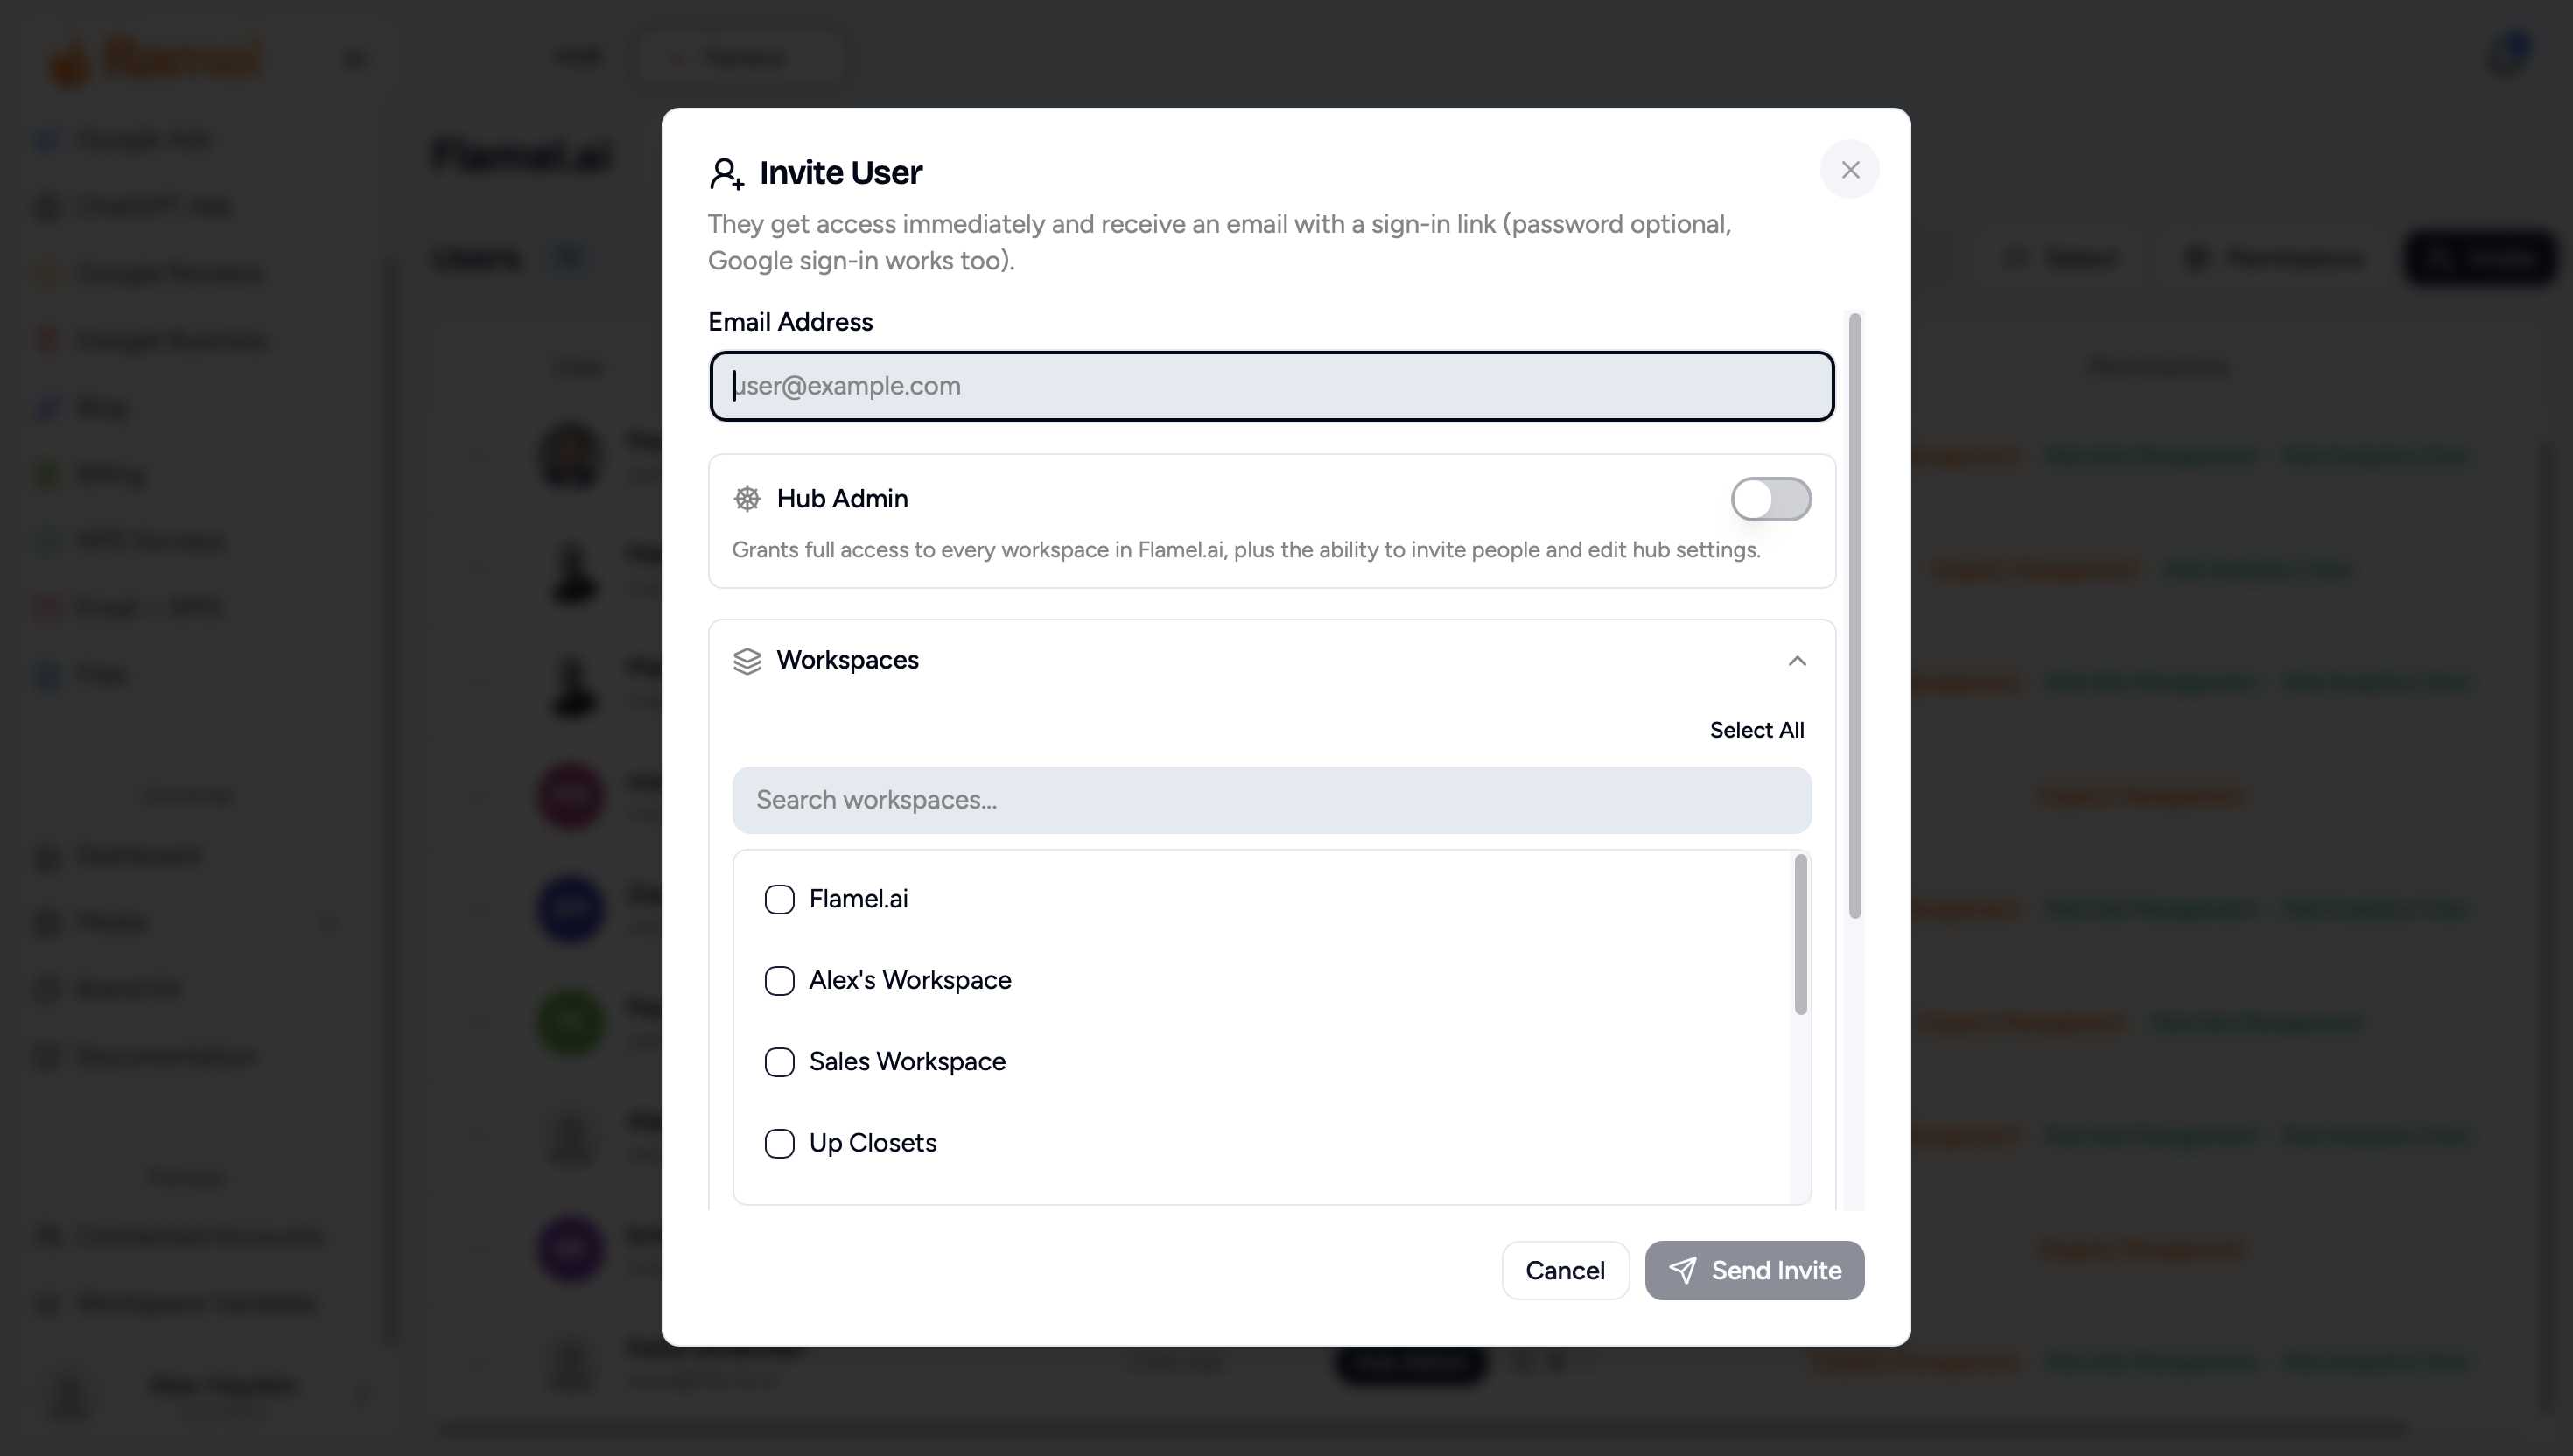
Open the Invite Form
Open Hub Users in Flamel, or open the Hub page and select the Users tab. Click Invite.
Adding a hub admin? Basic Info > Add admin opens the same dialog with the Hub Admin toggle already on.
Enter the Email Address
Use the address where the person should receive their invitation. If it matches someone already in the hub, Flamel recognizes them: existing workspaces stay checked, and saving updates their access immediately without sending an email sign-in link.
Decide Whether They Are a Hub Admin
Turn on the Hub Admin toggle to grant full access to every workspace, including ones added later, plus the ability to invite people and edit hub settings. Leave it off for regular members.
Select Their Workspaces
For members, check the workspaces this person should be able to open. Use the search box or Select All for long lists.
Set Their Permissions
Every solution is selected by default. Uncheck anything this person should not manage. You can change this later from the Users tab.
Send the Invite
For a new user, they get access right away and receive an email with a sign-in link. A password is optional, and Google sign-in works too. For existing hub members, click Add to Workspaces to save their new access immediately.
If Flamel could not confirm the email was sent for a new user, you see a warning instead of a success message. Their access is still saved. If the email does not arrive, use Resend login email on their row in Users.
You Can Change Access Later
The workspaces and permissions you choose here are not permanent. After the person is on the roster, update them from Users.
You do not need to be a hub admin to add someone to your own workspace. The invite form is the same one hub admins use, locked to the workspaces you can reach.
Open View Hub
Click your avatar in the bottom-left corner and choose View Hub, then select the Users tab.
Opening this page does not switch your active workspace. You stay where you were, and you only see Basic Info, Users, and Guests.
Click Invite
The roster lists everyone who can reach your workspaces, so check it first to avoid inviting someone who already has access.
Enter Their Email Address
Use the address where the person should receive their invitation. If they are already in the hub, Flamel recognizes them:
- An info banner displays confirming they are already a member of this hub.
- Their existing workspaces are pre-selected in the checklist so you can see what they have and check additional locations.
- The button changes to Add to Workspaces, saving their new access immediately without sending an email sign-in link.
Confirm the Workspaces
Your active workspace is selected by default. The list only contains workspaces you can access, so an invite sent from here can never reach the rest of the hub. Use Select All or Deselect All on the right to adjust multiple locations quickly.
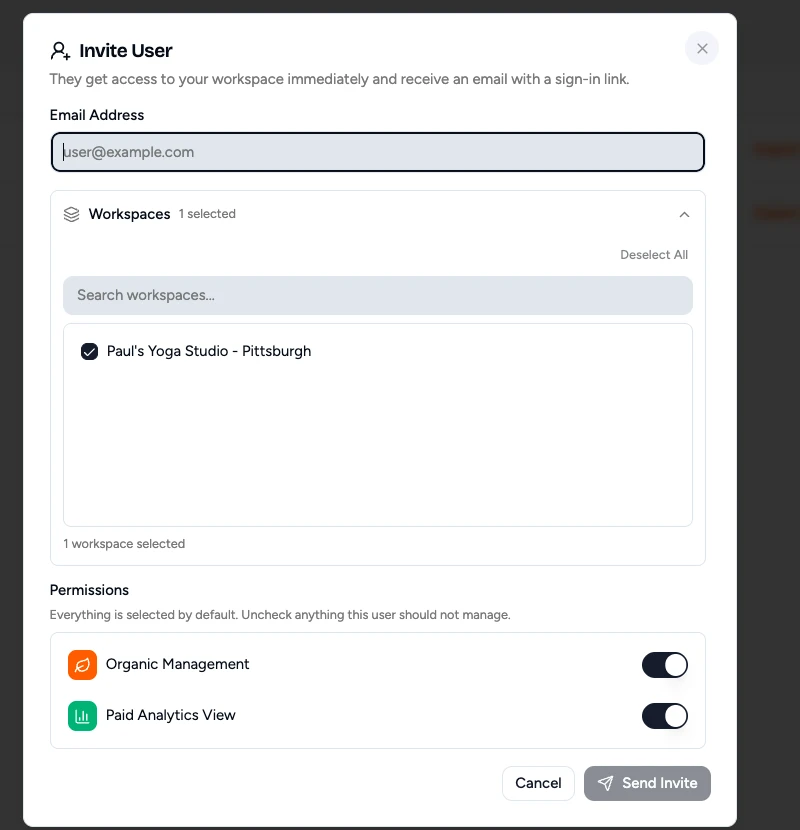
Choose What They Can Manage
Only the solutions you hold yourself appear in the list. Every permission you hold is selected by default; uncheck anything this person should not manage. You cannot grant a permission you do not have yourself.
Send or Save
For new members, click Send Invite: they get access to your workspace right away and receive an email with a sign-in link. For existing members, click Add to Workspaces: access updates instantly with no email wait.
Workspace Management Scope
Workspace users can invite new members and remove existing members from their own workspaces. Renaming members, editing hub settings, and granting hub-wide access remain hub-admin responsibilities.
What the Recipient Receives
The email contains a personal sign-in link that opens Flamel without a password. The link lasts 7 days and works once. Tell people not to forward it, because anyone who opens it is signed in as them. For read-only sharing, use Guests instead.
For first sign-in steps, expired links, and error messages, send them to Sign-in Links and Login Help.